
2.8. 트랙 컨트롤 사용하기 기본
아래 그림은 리퍼의 트랙 컨트롤들을 보여준다. 어떤 조절기가 보일지 여부나 트랙 패널에서 정확한 위치는 리퍼 테마, 트랙 레이아웃 선택, 트랙 높이나 TCP 넓이, 그리고 편곡 영역이나 믹서가 보이는지 여부에 따라 달라진다.

모든 컨트롤들이 믹서에도 있으므로, 많은 경우 TCP에도 모든 컨트롤이 다 나오는 것을 선호하지는 않는다.

기본 믹서와 트랙 패널의 레이아웃은 서로 연결되어 있다. Ctrl + M 키를 이용해 믹서 창을 닫으면, 트랙 패널에서는 모든 컨트롤들이 다 나타난다. 다시 Ctrl + M 키를 이용해 믹서 창을 열면, 몇몇 트랙 컨트롤들이 안보이게 된다. 랩탑에서 작업을 하는 경우나, 작은 모니터 하나만을 이용하는 경우, 화면을 효율적으로 사용하고 싶을 것이다. 이 경우 필요하지 않은 경우에는 믹서 창을 닫아놓기도 한다.
모든 컨트롤 위에 마우스 커서를 올려 놓으면 설명글이 뜬다. 원하는 컨트롤을 클릭해서 작업을 하거나, 그 컨트롤 위에서 마우스 오른쪽 클릭을 통해 더 많은 명령, 옵션, 설정 등을 담은 메뉴를 띄울 수도 있다.

2.8.1. 녹음
레코드 암 단추를 클릭해서 녹음 준비 상태가 되어야만 녹음 인풋, 인풋 소스 단추가 나타난다.
2.8.2. 음량과 조절기 다루기
첫 번째 보이는 로터리 조절기는 트랙의 음량을 조절한다. 다른 레이아웃을 선택하면 수평 페이더 형태가 되기도 한다. 가로든 세로든 혹은 로터리 조절기이든, 먼저 조절기를 마우스 왼쪽 클릭 한 상태에서 원하는 방향으로 끌어주고, 다시 마우스 단추를 놔주면 값이 변경된다. 로터리 조절기의 경우 마우스를 위쪽으로 끌면 시계방향으로 돌고, 아래쪽으로 끌면 반시계 방향으로 돌아간다.
팁1: Ctrl 키를 누른채 마우스를 끌어주면 더 미세하게 조절 가능하다.
팁2: 변경한 결과를 미리 듣기 하고 싶다면 Alt 키를 누른채 마우스를 끌어준다. 이 경우 마우스 단추를 놓아주면 원래의 값으로 돌아가게 된다.
팁3: 하나 이상의 트랙을 동시에 변경하고 싶다면, Ctrl 키를 누른채 원하는 트랙들의 트랙 번호 부분을 클릭해주고 Ctrl 키를 놔준다. 이렇게 되면 선택된 트랙 중 어느 트랙에서도 조절기를 변경해도, 선택된 모든 트랙들의 조절기들이 같이 움직이게 된다.
조절기 위에 마우스 커서를 올리고 스크롤 휠을 돌려도 조절기의 값을 변경할 수 있다. 이 기능을 켜두려면 Options > Preferences > Editing Behavior > Mouse 항목을 선택하고 Ignore mousewheel on all faders와 Ignore mousewheel on track panel faders 옵션 두 가지를 꺼둔다. 마우스 동작 설정은 22장에서 다룬다.
기본적으로, 트랙의 VU 미터는 음량 조절기 변경을 마친 후에 그 값을 반영해 보여주도록 되어 있다. 조절기 값을 변경 중에도 그 결과를 반영해 보고 싶다면 Options 메뉴에서 Pre-fader track metering 명령을 선택해둔다. 모든 트랙들에서도 조절기 변화를 선반영해서 보고 싶다면 Preferences > Appearance > Track Meters 항목에서 All Track meters display pre-fader levels 옵션을 켜둔다.
노트: 기본적으로, 음량과 팬 컨트롤은 미디가 아닌 오디오에 대해서만 작동한다. 어떤 트랙에서 이것을 바꾸려면, 트랙에서 마우스 오른쪽 단추를 클릭하고 메뉴에서 MIDI track controls > Link track volume/pan to all MIDI channels를 선택한다.
2.8.3. 뮤트와 솔로
음량 조절기 오른쪽 두 단추는 해당 트랙의 뮤트와 솔로 모드를 켜고 끄는 단추들이다.
노트: 뮤트와 솔로 컨트롤은 Alt나 Ctrl 같은 한정키와 함께 사용할 때 더 다양한 기능들을 수행할 수 있다. 자세한 사항은 5장을 참고한다.
2.8.4. 라우팅
Route 컨트롤을 클릭하면 라우팅 대화상자가 나타난다. 음량 값을 데시벨(dB) 단위로 입력할 수도 있고 (예를들어 -6), 팬 값을 백분율로 줄 수도 있으며 (예를들어 25R은 오른쪽 25%), 두께 값을 직접 입력할 수도 있다. 기본 설정으로 모든 출력은 부모 채널 1/2를 통해 마스터로 보내진다. 만약 현재 장치 설정이 그렇지 않다면 그에 맞춰 트랙 설정을 변경하고 오디오 장비를 통해 소리가 제대로 나는지 점검할 수 있다.

2.8.5. 패닝
또 다른 로터리 조절기는 패닝을 담당하는데, 음향 신호를 왼쪽 또는 오른쪽으로 더 보내거나 덜 보내도록 조절할 수 있다. 두 번째 팬 컨트롤이 보인다면 당장은 무시하고 넘어가자. 이것은 스테레오 두께 등의 특별한 팬 모드에서 사용되는 더 고급 개념으로 11장에서 다룬다.

2.8.6. 페이즈
패이즈 컨트롤 단추는 트랙의 위상을 뒤집어준다.
2.9. 트랙 관리하기
이제까지 음량, 팬, 뮤트, 솔로 같은 트랙 다루기를 보았다. 지금부터는 트랙을 옮겨다니거나, 지우거나, 크기를 조절하는 등의 관리 측면을 더 살펴보자. 관련된 명령과 액션들은 트랙 번호 등에서 마우스 우클릭을 하면 나타나는 컨텍스트 메뉴에서 볼 수 있다.

2.9.1. 마우스로 패널 넓이 조정
트랙 패널 영역의 넓이를 조절하려면 먼저 마우스 커서를 TCP와 주 영역을 구분하는 세로 경계 부분에 위치시킨다. 그러면 커서가 수평 방향으로 양쪽 화살표 모양으로 바뀐다. 이 때 경계선을 왼쪽 클릭한 후, 원하는 넓이로 끌어주고 왼쪽 단추를 놓아주면 트랙 컨트롤 패널의 넓이가 변한다.

2.9.2. 트랙 높이를 마우스로 조정
- 단일 트랙의 높이 조정: 트랙의 아래쪽 경계를 마우스 왼쪽 클릭 후 끌어주기.
- 선택된 트랙들의 높이 조정: 트랙 아래쪽 경계를 Alt + click 후 끌어주기.
- 모든 트랙들의 높이를 한 번에 조정: 아무 트랙이나 아래쪽 경계를 Ctrl + click 한 후 끌어주기, 또는 or 화면 맨 오른쪽 세로 스크롤바 아래쪽의 + 와 – 표시 사이를 마우스 왼쪽 클릭 후 끌어주기.
2.9.3. 키보드나 마우스로 트랙 높이 변경
- 모든 트랙들의 높이를 최소화하고 복구: ` 키. 이 키는 보통 숫자 1 키 바로 왼쪽, 탭 키 바로 위에 있다. 최소화 된 상태에서는 가장 최근 높이로 되돌린다.
- 모든 트랙들의 높이를 최대화하고 복구: ~ 키. 보통 Shift + ` 키에 해당된다. 이미 최대화 상태면 이전 높이로 되돌린다.
- 선택된 트랙들의 높이는 증가 시키고, 다른 것들은 최소화하고, 반복하면 이전 높이로 복구: ! 키. 보통 Shift + 1 키에 해당된다.
- 모든 트랙들의 높이를 최소화: @ 키. 보통 Shift + 2 키에 해당된다.
- 모든 트랙들의 높이를 최소화, 정상, 최대화 사이에서 왔다갔다 하기: 수직 스크롤바를 마우스 더블클릭.
- 선택된 트랙들이 트랙 높이 조정이나 세로 스크롤바 확대 축소 단축키에 영향받지 않도록 하기: 트랙에서 오른쪽 클릭 후 컨텍스트 메뉴에서 Lock track height 명령 선택.
- 트랙 컨트롤들을 잠그거나 풀기: 트랙에서 마우스 우클릭 후 Lock track controls 명령 선택.
2.9.4. 트랙 컨트롤 패널 (TCP) 내에서 이동
- 다음 트랙으로 이동: Ctrl + Alt + 아래 방향키.
- 이전 트랙으로 이동: Ctrl + Alt + 위 방향키.
2.9.5. 이동, 복사, 지우기 등
- 트랙들에서 위 아래로 옮기기: 트랙 패널을 클릭하고 트랙 리스트의 위 아래 방향으로 마우스로 잡아 끌어다 놓는다. 이 때 마우스 커서가 손 모양이 되는 것을 확인하고 놓아야 한다.
- 인접한 두 개 이상의 트랙을 한 번에 옮기기: 첫 번째 트랙을 클릭하고, Shift 키를 누른채 마지막 트랙을 클릭해 선택한다. 이제 Shift 키에서 손을 떼고 위처럼 잡아 끌어다 놓는다.
- 트랙 지우기: 마우스 우클릭 후 Remove tracks 메뉴를 선택하거나, 트랙을 클릭하고 Delete 키를 누른다.
- 두 개 이상의 트랙을 한 번에 지우기: Ctrl 키를 누른채 여러 트랙을 클릭해 선택한 후, Delete 키를 누르거나 마우스 우클릭 후 Remove tracks 메뉴를 선택한다.
- 트랙들을 다음 칸으로 복사하기: 트랙들을 선택하고, 그 중 하나에서 마우스 우클릭 후 Duplicate tracks 메뉴를 선택한다.
- 트랙을 특정 위치로 복사하기: 트랙을 클릭해 선택하고 Ctrl + C 키를 누른다. 원하는 위치의 트랙을 클릭하고 Ctrl + V 키를 누르면 그 아래로 복사된다. 둘 이상의 트랙을 이렇게 복사하려면 처음에 여러 트랙을 선택하고 진행한다.
팁: 마스터를 트랙 뷰에 표시하려면 TCP의 빈 칸에서 마우스 우클릭 후 Show master track 옵션을 선택하거나, Ctrl + Alt + M 단축키를 누르면 표시하거나 없앨 수 있다.
2.10. 비주얼 트랙 스페이서
리퍼의 비주얼 트랙 스페이서란 트랙 사이에 삽입되어 간격을 띄워, 어떤 트랙들이 비슷하게 묶여있는지 파악하기도 편하고, 전체 화면이 잡동사니처럼 복잡해지는 것을 방지하는데도 도움이 된다. 다음 그림은 간단한 예이다.
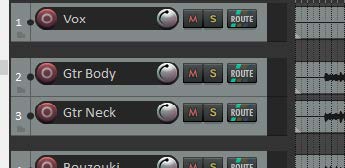
예제에서는 보컬 트랙과 두 기타 트랙이 있다. 스페이서가 두 기타 트랙의 위와 아래에 삽입되어 다른 트랙들과 시각적으로 구분되어 보이도록 한다.
스페이서를 추가하거나 삭제하려면, 트랙 패널의 빈 곳에서 마우스 오른쪽 단출르 클릭하고 Visual spacer 메뉴를 선택한다. 선택할 수 있는 명령은 트랙의 위나 아래에 스페이서를 추가하거나, 위나 아래의 스페이서를 제거하는 것이 주어진다. 연속된 트랙들의 맨 위나 가장 아래에 스페이서를 추가하려면, 관련된 트랙들을 다 선택하고 마찬가지로 마우스 우클릭에서 Visual spacer 메뉴를 선택한다.

트랙 스페이서의 기본 높이는 16 픽셀인데, 이 설정은 Options > Preferences > Appearance 페이지에서 변경할 수 있다.
하나의 트랙이나 여러 트랙들의 선택 묶음을 마우스로 잡아 위아래로 끌면, 스페이서의 아래쪽, 위쪽 또는 스페이서 사이로도 이동시킬 수 있다. 반면에 스페이서를 한 트랙에서 다른 트랙으로 옮기려면 스페이서를 마우스 왼쪽 클릭으로 잡아 끌면 된다. 이동이 아닌 복사시키려면 Ctrl 키를 누른채 마우스로 잡아 끌면 된다.

이 아래는 같은 내용을 영문으로 번역한 것임.
The above is a Korean translation of the same below.
2.8. Using the Track Controls Basics
The illustration below shows REAPER's track controls. Which faders are visible and their exact position in the track panel may vary according to factors such as the REAPER’s theme, the track layout, the track height and the track control panel width and whether the Arrange View and the Mixer are shown or not.
Since all controls are shown in the mixer, many users prefer not to show all of them in the TCP. The default mixer and track panel layouts are dynamically linked: if you close the mixer with Ctrl + M, all controls will then become visible in the track panel. Reopen the mixer with Ctrl + M and some track controls will again be hidden. Especially if you are working on a laptop, or have only one monitor, in order to be able to make the best use of screen space you might wish to keep the mixer open only when you are needing to use it.
You can hover your mouse over any control for a tooltip. You can click on a control to engage it, or right click on a control for a menu of commands, options and/or settings.
2.8.1. Record
Note that Record input and Input source in the picture are only visible when Record arm is enabled.
2.8.2. Volume and Metering
The first rotary fader shown here adjusts a track’s volume. With some layouts, this is shown as a horizontal fader. To adjust any horizontal, vertical or rotary faders in REAPER, you can left click-drag faders in the direction required, releasing the mouse when finished. For rotary faders, drag up to rotate clockwise, down for anti-clockwise.
Tip1: Hold Ctrl while doing this for more subtle adjustments.
Tip2: To audition possible changes, hold down the Alt key while dragging the fader with the mouse. When you release the mouse, it will then return to its original position.
Tip3: To work with more than one track, hold down Ctrl while clicking in the Track control panel on each track number required. Then release Ctrl. Any fader or other movement will be applied to all selected tracks.
You can hover your mouse over the fader, use the Scroll Wheel to adjust the level down/up. To enable this feature, go to Options > Preferences > Editing Behavior > Mouse and deselect Ignore mousewheel on track panel faders and on all faders. See also mouse behavior preferences in Chapter 22.
By default, a track's VU meter shows the signal after being adjusted by the volume fader. If you wish instead to show the pre-fader level, choose from the Options menu Pre-fader track metering. There is an option in Preferences > Appearance > Track Meters for all track meters to display pre fader levels.
Note: By default, the volume and pan controls work with audio items, not MIDI. To change this for any track(s), choose MIDI track controls > Link track volume/pan to all MIDI channels from the right-click menu.
2.8.3. Mute/Solo
The two buttons on the right of the volume toggle Mute/Solo on/off for selected track(s).
Note: Both the Mute and Solo controls can also be used with modifier keys such as Alt and Ctrl for various functions. See Chapter 5 for details.
2.8.4. Routing
Clicking on the Route control opens the routing dialog box. You can enter values as dB for volume (e.g. -6) and as percentages for pan (e.g., 25R for 25% right) and width directly into this box. By default all output goes to the Master via parent channels 1/2. If this is not so, adjust the track settings accordingly and check that your audio device output settings are correct.
2.8.5. Panning
The other rotary adjusts the panning, sending the signal more to the left or the right as preferred. If you see a second pan control, ignore it for now. This is used with some pan modes to control stereo width, a more advanced concept covered in Chapter 11.
2.8.6. Phase
The phase control button can be used to reverse track polarity.
2.9. Managing Tracks
You have already encountered basic REAPER track controlling features, such as Volume, Panning, Mute and Solo. We can now introduce others such as moving, removing, making larger or smaller tracks. Many of the relevant to track commands and actions are available from the menu that is displayed when you right click over any track number.
2.9.1. Adjusting Panel Width with Mouse
To adjust the width of the track panel area, hover your mouse over the vertical border separating the TCP from the main area. The cursor changes to a horizontal double headed arrow. Drag the border left or right to decrease/increase track panel width and release the button when the desired track control panel width is reached.
2.9.2. Adjusting Track Height with Mouse
- Adjust height of single track: Click and drag up or down on lower track boundary
- Adjust height of selected tracks: Alt + click and drag up or down on lower track boundary
- Adjust height of all tracks: Ctrl + click and drag up or down on any lower track boundary or Click and drag up or down between + and – on vertical scrollbar
2.9.3. Toggling Track Height with Keyboard or Mouse
- Minimise and restore height of all tracks: ` key. This is the key immediately to the left of 1, usually directly above the Tab key. If already minimised, restore tracks to most recent previous height.
- Maximise and restore height of all tracks: ~ key. On most keyboards, this is the Shift + ` key. If already maximised, restore to previous height.
- Increase height of selected tracks, minimise others. Repeat to restore previous track height: ! key. On most keyboards, this is the Shift + 1 key.
- Minimise all tracks: @ key. On most keyboards, Shift + 2 key.
- Toggle height of all tracks between minimised, normal and maximised: Double click mouse on vertical scroll bar.
- Make selected track(s) unaffected by track height adjustment and vertical zoom shortcut keys: Use Lock track height command on track right-click context menu.
- Lock/unlock track controls: Use Lock track controls command on track right-click context menu.
2.9.4. Navigating within the Track Control Panel (TCP)
- Go to next track: Ctrl + Alt + Down.
- Go to previous track: Ctrl + Alt + Up.
2.9.5. Copying, Moving, Deleting
- Move a track up or down the track order: Click in the track panel, then drag the track up or down the track list, then release the mouse. Make sure the mouse displays a hand before you release it.
- Move two or more adjacent tracks up or down: Click on the track number for the first track, then hold Shift while clicking on the track number(s) of the last track to be selected. Release the Shift key, then click and drag up or down.
- Delete a track: Right click and choose Remove tracks or click on the track number then press Delete.
- Delete two or more tracks: Use Ctrl + click to make your selection then press Delete, or right click and choose Remove tracks.
- Copy a track or tracks as the next track(s): Select track(s). Right click on one, choose Duplicate tracks.
- Copy a track to a specified location: Click on the track number. Press Ctrl + C. Move to the required location then press Ctrl + V. To do this with more than one track, select all required tracks first.
Tip: To display the Master in Track View, right click anywhere in the Track Control Panel area, below the last track. Choose Show master track, or use the keys Ctrl + Alt + M to toggle.
2.10. The Visual Track Spacer
REAPER’s visual track spacer can be used to insert a spacer between any tracks, as required. This can be helpful in easily identifying in a project tracks which belong together, or simply to prevent screen clutter. A simple example is shown here.
Shown left are a vocal track and two guitar tracks. A spacer has been inserted above the first and after the second guitar track to visually separate them from the other tracks.
To add or remove the spacer, right clicking over a track’s track panel and choosing Visual spacer from the context menu. Options are to add a spacer before or after the track, or both, or to remove existing spacers. To add a spacer after or before a number of adjacent tracks, simply select all of the required tracks and right click over any one of their track panels, choose Visual spacer from the menu, then make your selection as before.
Default track spacer height is 16 pixels, you can change this value in your Options > Preferences > Appearance settings.
If you are moving a track or track selection up or down the track order, you can drop the track below a spacer to place it after the spacer, above a spacer to place it before the spacer, or in the middle of a spacer to show spacers both above and below it. To move a spacer from one track to another, use Left drag up or down. To copy a spacer from one track to another, use Ctrl + left drag up or down.
'오락과 여흥 > Reaper (리퍼)' 카테고리의 다른 글
| 리퍼 사용자 가이드 - 2-5. FX 기초 2 (0) | 2023.11.04 |
|---|---|
| 리퍼 사용자 가이드 - 2-4. FX 기초 1 (1) | 2023.11.04 |
| 리퍼 사용자 가이드 - 2-2. 재생, 내비게이션 (1) | 2023.11.03 |
| 리퍼 사용자 가이드 - 2-1. 프로젝트 설정 (0) | 2023.11.02 |
| 리퍼 사용자 가이드 - 1-3. 기본설정 (1) | 2023.11.02 |


댓글